So, you’re thinking about diving into video content creation? Awesome! It can feel a bit overwhelming at first, but the good news is, it’s more accessible than ever. Basically, the best way to start creating video content is to just… start. Grab your phone, pick a topic you’re passionate about, and hit record. Don’t wait for perfect gear or a grand plan. The real learning happens when you’re in the process.
Let’s break down some practical steps and mindset shifts that’ll help you get moving and keep going.
Before you even think about pressing record, it’s helpful to have a rough idea of what you want to talk about. This isn’t about boxing yourself in forever, but it gives you a starting point.
What Are You Genuinely Interested In?
This is the absolute core of it. If you’re not interested in your topic, it’s going to show. Your energy will be low, and it’ll be a chore to create. Think about:
- Hobbies and Passions: What do you do in your free time? What do you love talking about with friends? This could be anything from baking sourdough, collecting vintage records, or hiking trails.
- Work or Skills: Do you have expertise in a particular area? Maybe you’re great at organizing, troubleshooting tech problems, or have a unique perspective on your industry.
- Problems You Can Solve: What are common frustrations people have? Can you offer solutions, tips, or insights that make their lives easier?
Don’t feel like you need to invent something brand new. Often, putting your own spin on a popular topic can be incredibly effective.
Who Are You Talking To?
Once you have a general idea of your topic, consider who you want to reach. This helps you tailor your language, tone, and the type of content you create.
- Your Ideal Viewer: Imagine someone. What are they like? What problems do they have? What are they looking for? Are they beginners wanting basic introductions, or more advanced users looking for nuanced details?
- Relatability is Key: Even if you’re talking about something technical, finding ways to make it relatable to a broader audience will help. Think about the everyday implications of your topic.
What’s Your Unique Angle?
Even if there are already hundreds of videos on your chosen topic, what can you bring to the table that’s different?
- Your Personality: This is your superpower. Your sense of humor, your way of explaining things, your genuine enthusiasm – these are all unique.
- Your Personal Experience: Share your own journey, your mistakes, your successes. Authenticity resonates.
- A Different Perspective: Can you offer a beginner-friendly approach where others are too technical? Can you simplify complex ideas?
2. Planning Your Content (Without Overcomplicating It)
The word “planning” can sound daunting, but for beginners, it’s more about clarity than rigid structure.
Keep It Simple: The “Hook, Value, Call to Action” Model
This is a foundational structure that works for most videos.
- Hook (First 5-10 Seconds): Grab attention immediately. This could be:
- A compelling question.
- A surprising statistic.
- A preview of what’s to come.
- A relatable problem.
- Example: Instead of saying “Today, I’m going to talk about editing,” try “Are you tired of your videos looking amateurish? In the next 5 minutes, I’ll show you the one editing trick that changed everything for me.”
- Value (The Main Content): This is where you deliver on your hook. Provide information, entertainment, or solutions.
- Break down information into digestible chunks.
- Use clear language.
- Show, don’t just tell (demonstrate if applicable).
- Call to Action (CTA) (End of Video): What do you want viewers to do next?
- Subscribe.
- Like the video.
- Leave a comment.
- Visit a website.
- Watch another video.
- Keep it focused: Don’t ask for too many things at once.
Brainstorming Video Ideas
Once you have your niche and target audience, start brainstorming specific video topics.
- “How-To” Videos: Show people how to do something. This is a perennial favorite.
- Listicles: “5 Tips for…”, “Top 10 Mistakes…”, “3 Essential Tools for…”
- Reviews/Opinions: Share your thoughts on products, services, or concepts.
- Behind-the-Scenes: If you have a process or a workspace, share it.
- Q&A/Ask Me Anything: Answer common questions from your audience.
- Explainer Videos: Break down complex topics into simple terms.
Simple Scripting or Bullet Points
You don’t need a Hollywood screenplay.
- Outline Key Points: Jot down the main topics you want to cover in order.
- Write Down Your Opening and Closing: Knowing how you’ll start and end can boost your confidence.
- Practice: Reading through your points a few times will make you more comfortable and natural on camera. Avoid memorizing word-for-word, as it can sound stiff.
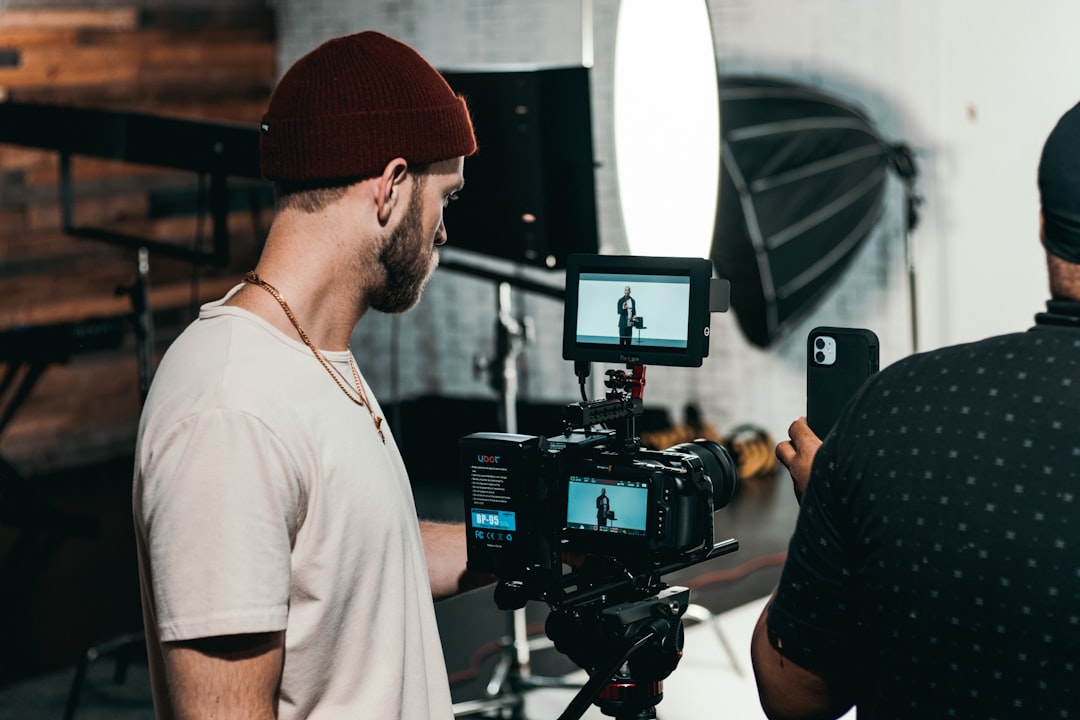
3. Gear and Setup: Start with What You Have
The biggest barrier for many beginners is the perceived need for expensive equipment. Trust me, you don’t need it to start.
Your Smartphone is Your Best Friend
Modern smartphones have incredible cameras. They are perfectly capable of producing high-quality video for platforms like YouTube, TikTok, and Instagram.
- Camera Quality: Most phones shoot in HD (1080p) or even 4K. Ensure your settings are appropriate for what you want to achieve.
- Stabilization: Most phones have built-in image stabilization. For smoother shots, consider a mini tripod or a gimbal if you plan on moving a lot.
- Storage: Videos take up space. Make sure you have enough storage or a way to transfer files.
Lighting: The Underrated Hero
Good lighting makes a massive difference, often more than a fancy camera.
- Natural Light is Free and Fantastic: Position yourself facing a window. This is often called “soft light” and is very flattering. Avoid having a bright window behind you, as it will make you look like a silhouette.
- Basic Household Lamps: You can often use lamps you already own. Diffuse the light by bouncing it off a wall or a white sheet.
- Ring Lights: While not essential, a simple ring light can provide consistent, flattering light for around $20-$50. They’re a good early investment if you find yourself struggling with light.
- Avoid Overhead Lighting: This can create harsh shadows under your eyes and nose.
Audio: Don’t Neglect Your Sound
Bad audio can make even the best video unwatchable. People are surprisingly forgiving of slightly imperfect video quality if the audio is clear.
- Your Phone’s Microphone: For short, close-up recordings in a quiet room, your phone’s built-in mic might be sufficient.
- Minimize Background Noise: Find the quietest place you can. Turn off fans, air conditioning, and shut doors and windows.
- External Microphones (Optional but Recommended):
- Lavalier (Lapel) Mics: These clip onto your shirt and are relatively inexpensive (often $15-$30 for decent ones that plug into your phone). They capture your voice clearly and reduce background noise.
- USB Microphones: If you’re recording at a desk, a USB mic can significantly improve audio quality for voiceovers or talking-head videos.
Backgrounds: Keep it Clean and Uncluttered
Your background is part of the visual story.
- Simple is Best: A plain wall, a bookshelf, or even a neatly organized corner of a room can work well.
- Avoid Distractions: Anything overly busy or messy can pull attention away from you and your message.
- Consider Your Topic: If you’re talking about gardening, a natural, green background might be appropriate.
4. Filming Your Video: The Actual Doing Part
This is where creativity meets execution.
Framing and Composition
How you position yourself in the frame matters.
- The Rule of Thirds: Imagine a tic-tac-toe board overlaid on your screen. Place your eyes or the main subject along the intersection points. This creates a more visually appealing and dynamic image than simply putting yourself dead center.
- Headroom: Leave a little space above your head, but not too much. Too much headroom can make you feel small or distant.
- Eye Level: Position your camera so it’s roughly at eye level with you. This creates a direct and natural connection with the viewer. If you’re using a phone, prop it up on books or a small tripod.
- Shot Types (for talking-head videos):
- Medium Shot: From the chest or waist up. This is a common and engaging shot.
- Close-Up: From the shoulders up. This is good for conveying emotion or focus.
Recording Techniques for Better Footage
Beyond just hitting record, consider how you’re capturing the video.
- Shoot Horizontally: Unless you’re specifically creating content for platforms like TikTok or Instagram Reels (which are vertical), shoot your videos horizontally (landscape mode). This is the standard for platforms like YouTube and is what most people are used to.
- Multiple Takes: Don’t expect to nail it on the first try. Record sections multiple times until you’re happy with them.
- B-Roll Footage: This is supplementary footage you can cut into your main video to make it more visually interesting.
- Examples: Shots of what you’re talking about, close-ups of objects, relevant stock footage, screen recordings.
- Importance: B-roll helps to illustrate your points, break up long talking segments, and can cover up jump cuts in editing.
What to Do During Recording
It’s more than just speaking.
- Speak Clearly and Enthusiastically: Even if you’re talking about a dry subject, try to inject some energy into your voice.
- Make Eye Contact (with the Lens): Imagine the camera lens is the eye of your viewer. This creates a connection.
- Body Language: Use natural gestures. Don’t be afraid to move, but try to avoid excessive fidgeting.
- Pacing: Speak at a moderate pace. Too fast and people won’t understand; too slow and they might get bored.
- Humor and Personality: Let your natural self shine through. It’s what makes you unique.
5. Editing: Bringing It All Together
This is where the magic happens, and it’s less intimidating than it sounds.
Editing Software Options for Beginners
You don’t need to be a tech whiz.
- Mobile Editing Apps:
- CapCut: Free, powerful, and user-friendly. Available on iOS and Android. Great for quick edits and adding effects.
- InShot: Also free with optional paid features. Good for basic edits, text, music, and adding filters.
- iMovie (iOS/Mac): Comes free with Apple devices. It’s a bit more robust and can handle more complex projects.
- Desktop Software:
- DaVinci Resolve (Free Version): Professionally renowned software with a free version that is incredibly powerful. It has a steeper learning curve but is worth exploring if you’re serious about editing.
- OpenShot: A free, open-source video editor that’s simpler than Resolve. Good for basic cuts, transitions, and adding titles.
- Shotcut: Another free and open-source option.
The Basic Editing Workflow
Focus on these key steps first:
- Import Your Footage: Get all your video clips, audio files, and any B-roll into your editing software.
- Rough Cut: Go through your footage and cut out the unnecessary parts – mistakes, long pauses, tangents. Just get the core content in order.
- Add B-Roll: Sprinkle in your supplementary footage where it makes sense to illustrate points or cover cuts.
- Transitions: Use simple cuts between most clips. Dissolves and fades are fine sparingly, but avoid overuse of flashy transitions.
- Audio Adjustments:
- Leveling: Make sure your voice is at a consistent volume.
- Noise Reduction (if needed): Some software has tools to reduce background hum.
- Music/Sound Effects: Add background music (ensure it’s royalty-free or you have permission) if it enhances the mood.
- Add Text and Graphics:
- Titles: Use clear, readable fonts for your video titles or section headings.
- On-Screen Text: Highlight key points or add labels.
- Subtitles/Captions: Highly recommended for accessibility and for viewers who watch with the sound off.
- Color Correction (Optional but Helpful): Make your colors look good. Most software has basic tools to adjust brightness, contrast, and saturation.
- Export: Render your video in a suitable format (usually MP4) and resolution (e.g., 1080p).
Common Editing Mistakes to Avoid
- Jump Cuts: When you cut between two similar shots of the same person, it can look jarring. B-roll (or even subtle reframing) can help smooth these out.
- Overuse of Music: Loud or distracting music can drown out your voice. Let your audio breathe.
- Too Much Text: Don’t crowd the screen with text. Keep it concise.
- Long, Uninterrupted Talking Segments: Break these up with B-roll, graphics, or even a change of shot if possible.
6. Publishing and Promoting Your Videos
Creating the video is only half the battle. Getting people to see it is the other.
Choosing Your Platform(s)
Where will your videos live?
- YouTube: The king of long-form video. Great for tutorials, vlogs, educational content, and more in-depth discussions.
- TikTok/Instagram Reels: Ideal for short, engaging, trend-driven content. Excellent for quick tips, behind-the-scenes glimpses, and personality-driven shorts.
- Facebook/Instagram Feed: You can post longer videos here, but consider your audience and how they consume content on these platforms.
- LinkedIn: If your topic is professional or business-related, LinkedIn can be a great place for insightful videos.
Optimizing for Discovery
Help people find your content.
- Catchy Titles: Make them informative and intriguing. Include relevant keywords.
- Compelling Thumbnails: This is the first visual hook. Make it clear what the video is about and make it visually appealing. Use your face if it’s a personal video.
- Detailed Descriptions: Use this space to elaborate on your video’s topic, include links, and add more keywords.
- Relevant Tags/Hashtags: Use a mix of broad and specific tags that accurately describe your video.
Promoting Your Content
Don’t just upload and hope for the best.
- Share on Social Media: Post about your new video on your other social media profiles.
- Engage with Your Audience: Respond to comments and questions. Build a community.
- Collaborate (Eventually): Once you’re comfortable, consider collaborating with other creators in your niche.
- Cross-Promote: Mention your other videos within your current videos (e.g., “If you want to learn more about X, check out my video on Y here.”).
- Email Lists (If Applicable): If you have an email list, let your subscribers know about new content.
Consistency is More Important Than Perfection
This is perhaps the most crucial piece of advice. Don’t get discouraged if your first few videos aren’t blockbusters. The algorithm (on platforms like YouTube) often favors creators who upload regularly. Aim for a schedule you can realistically maintain, even if it’s just one video every two weeks. Your skills will improve with every video you make. The journey of creation is the destination. So, jump in, experiment, learn, and most importantly, have fun with it!